Types of Residential Switches
There are many kinds of switches that can be used in your house. A single pole switch is the most common kind of switch beside the three-way switch and four-way switch.
HOW DO I tell the difference?
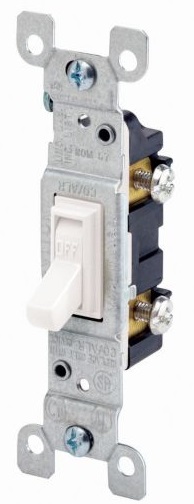
A single pole switch is used to control a load (typically a light) from only one location and has only two wire connections. Single Pole Switch
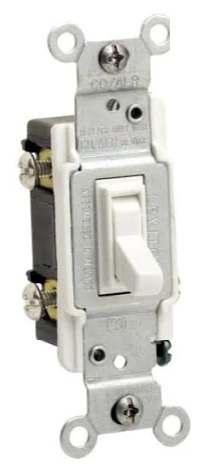
A three-way switch is used to control a load from two or more locations and has three wire connections. About 3X the cost of a single pole switch. 3-Way Switch
 4-Way Switch
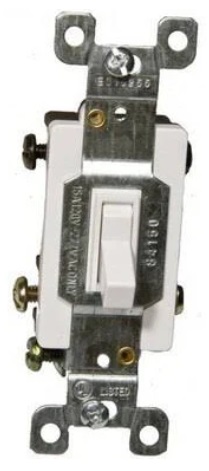
A four-way switch is used to control a load from three or more locations and must always be used in conjunction with two three-way switches. A four-way switch has four wire connections. Almost 20X the cost of a single pole switch.
Further to the type of switch, you will also need to consider:
* Current rating (15A or 20A). 15A is the most common but you should match the switch rating to the supply wire and circuit breaker/fuse.
* Type of wiring in your house. If you have aluminum wiring, you need a special switch (Marked Co/Alr) and they are more costly.
For a demonstration on how to identify these switches and where they are used, click on the video link below!
Changing out a Switch
There are a few reasons you may want to change out your switches. It may be simply because you want a different colour, or maybe you want a different style. Or maybe the switch you have had for some time has suddenly stopped working or has started sparking when you operate it. If this is the case, you must change it out as soon as possible. You will need to read and understand the type of switches from the topic above so that you are replacing the existing switch with the same type. It is possible to use any of the switch types above for a single pole application however, that is a very costly solution since a single pole switch is much cheaper. With that said, you shouldn't attempt to use the wrong switch type in the wrong application by trying to do some creative wiring. In short, use the correct switch for the right application.
HOW DO I DO that?
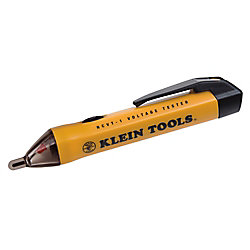
 Non-Contact Voltage Tester
It is highly recommended that you purchase a circuit tester before you start any electrical projects that require removing a device face-plate. A simple non-contact circuit tester can be purchased from your local hardware store for under $30.
The first step in every electrical project is to DISCONNECT THE POWER SUPPLY! Go to your electrical panel or fuse box and switch off the correct breaker or remove the correct fuse for the switch you want to replace.
Warning, if you open an electrical box NEVER assume that all of the power has been turned off. Check EVERY wire with a tester before proceeding. Do NOT proceed until ALL of the wires have been de-energized.
First, remove the device cover face plate and then, remove the device screws from the device box. Pull the device out of the box to expose the wiring and wire connection screws. Have a look at how the wire is connected to the device. If the wires terminate around the screws then unscrew these screws as far as they will go. Pull firmly on the wire away from the screw to un-form the hook of the wire and then remove the wire from the termination screw. If the wires enter into a hole in the back of the device, then you will need to have a small screwdriver that will fit into the slot just below these holes. Press the screwdriver into the slot at the same time pulling the wire out of the hole. After all of the wiring connections have been removed, the device will be free for removal.
To install the new switch, connect the wiring to the termination screws on the sides making sure to match the same wires to the same colour screws that the old switch was connected to. Carefully fold the wire up and push the assembly into the device box and install the device screws. The last step is to place the face plate over the device and install the face plate screws. Restore the power supply.
Please click on the video link below for a full explanation and demonstration on how to safely and correctly replace a switch!